

How to Install Ride Height Adjusters in Your Race Car Chassis
Posted by Craig McCormick on Sep 24th 2021
The best chassis modification to easily adjust ride height on your race car.
A while ago I installed a set of front ride height adjusters to my American Muscle Car Masters Mustang. The chassis is a Howe ASA/GTA chassis but this article can easily be adapted to your particular chassis.
Tools needed are pretty standard shop equipment for most grassroots racers; measuring tape, sharpie, painter’s tape, drill, hole saw and a welder.
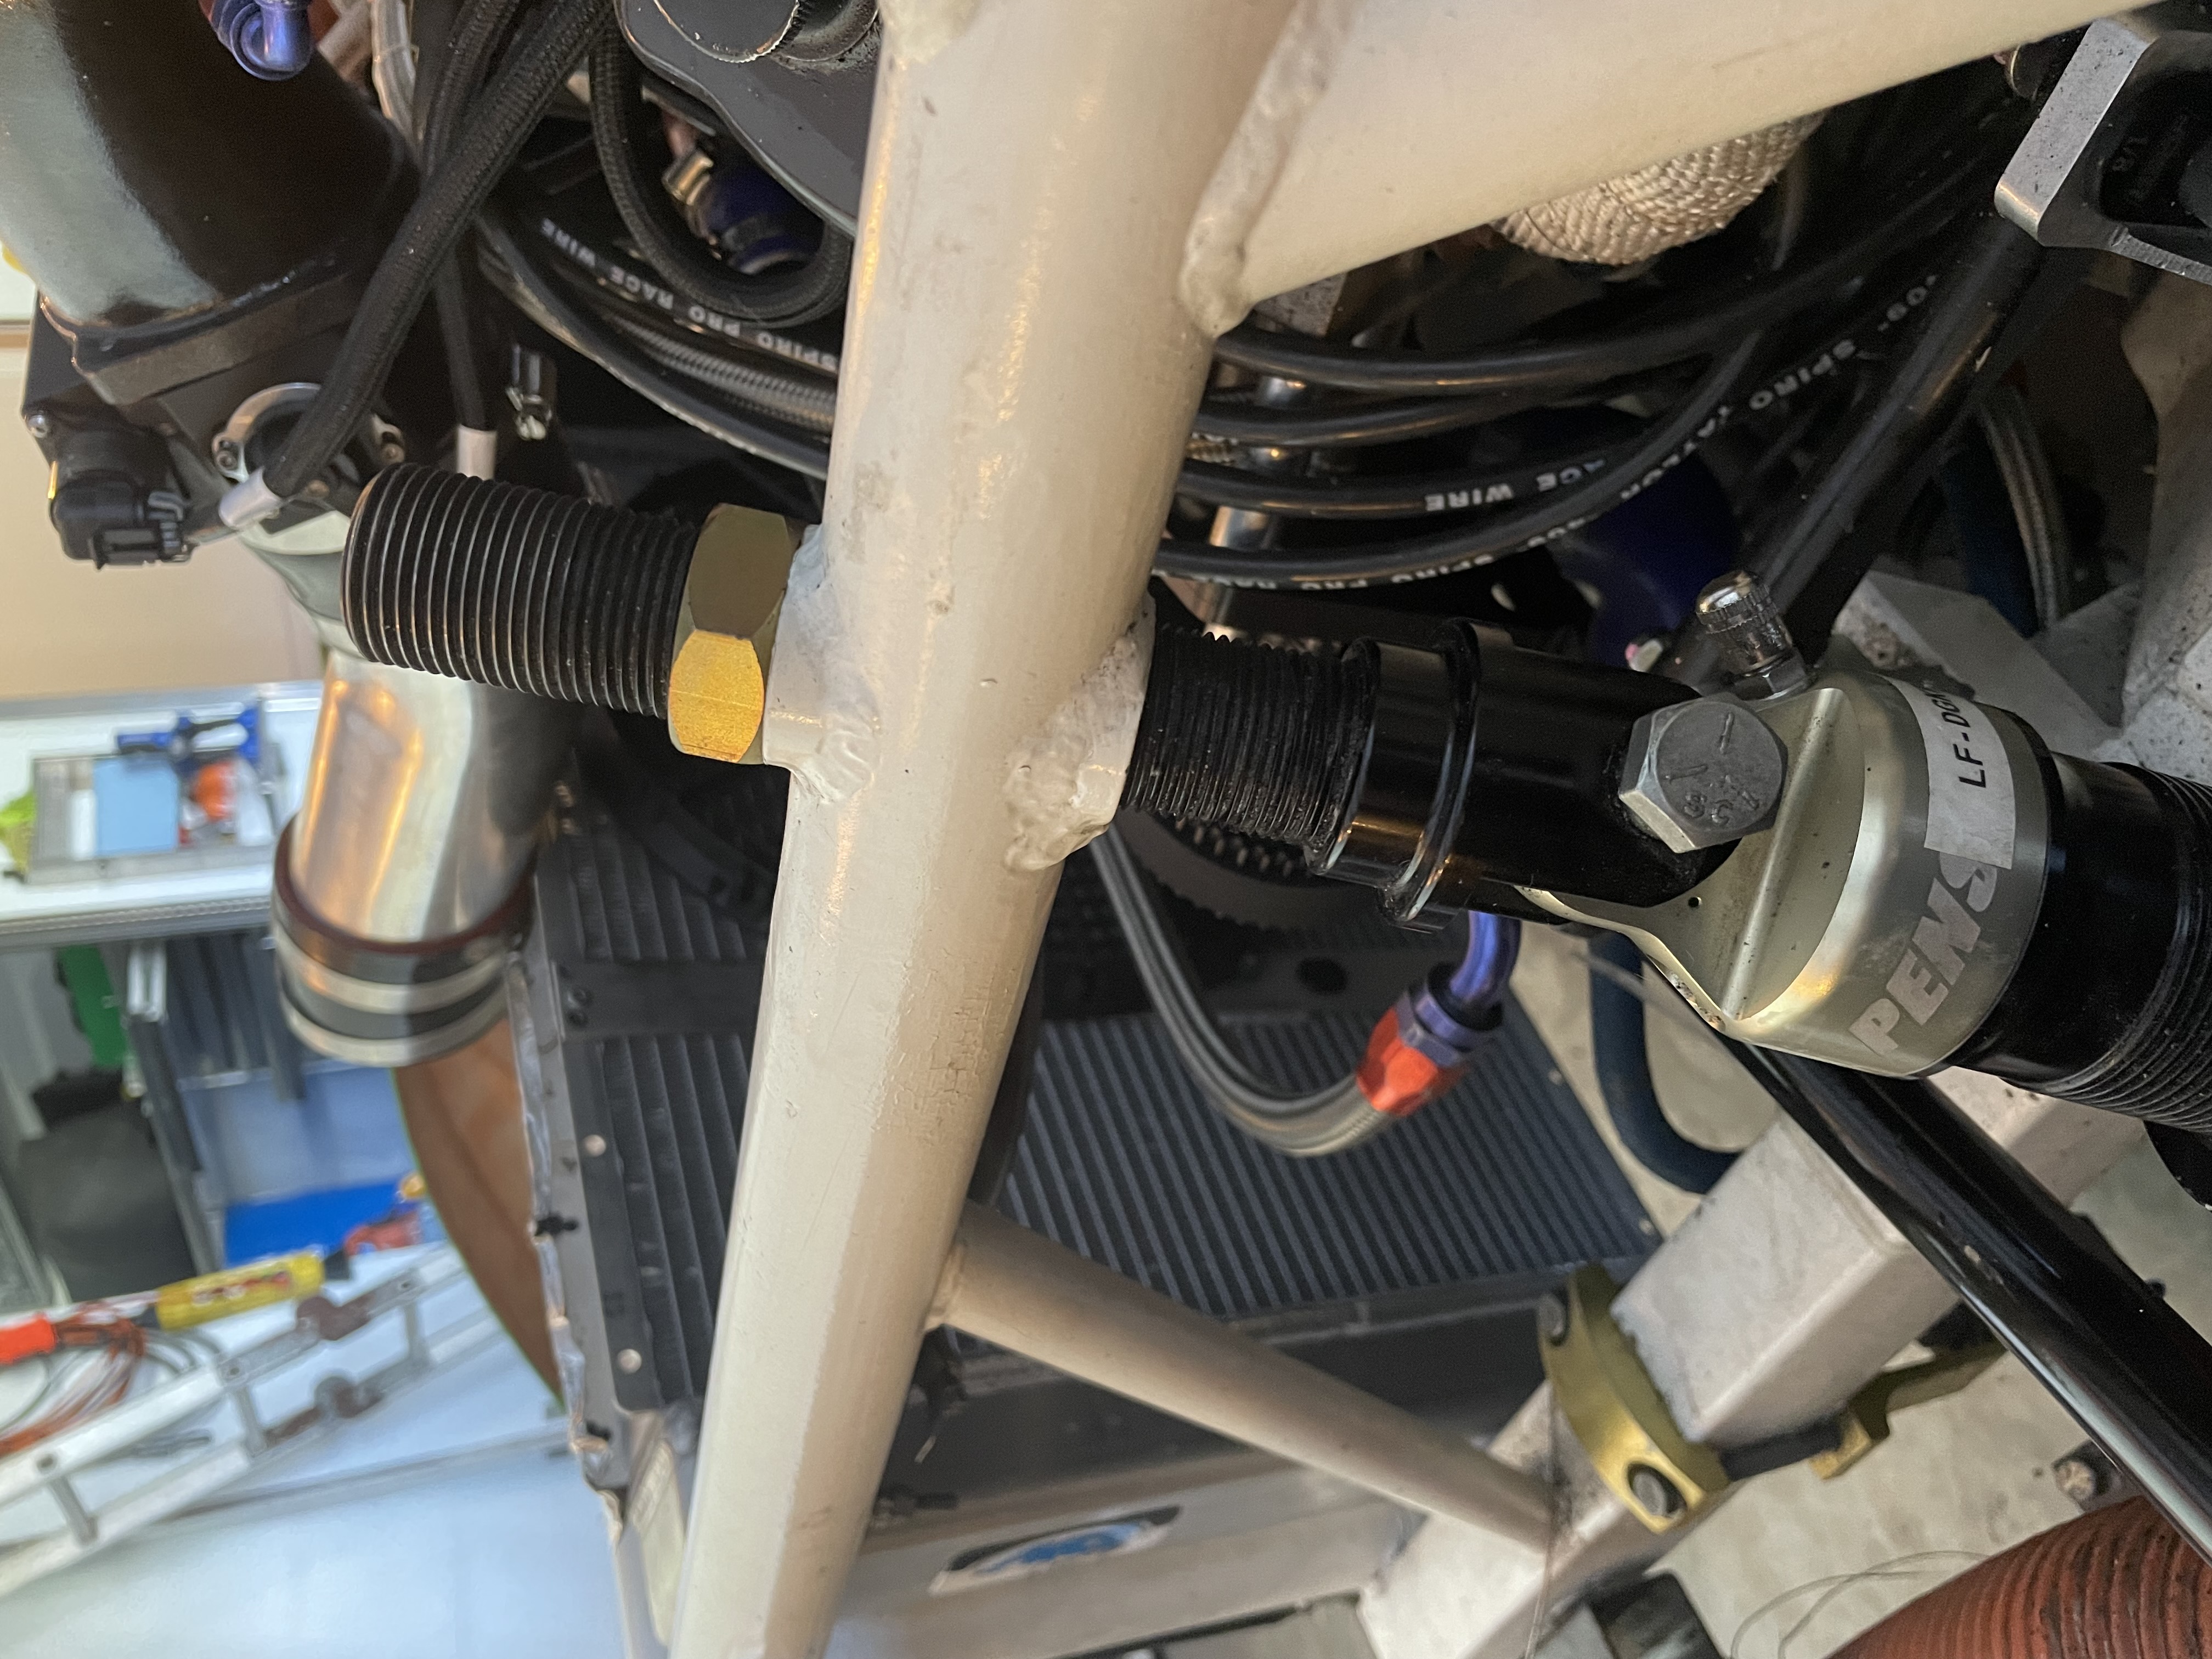
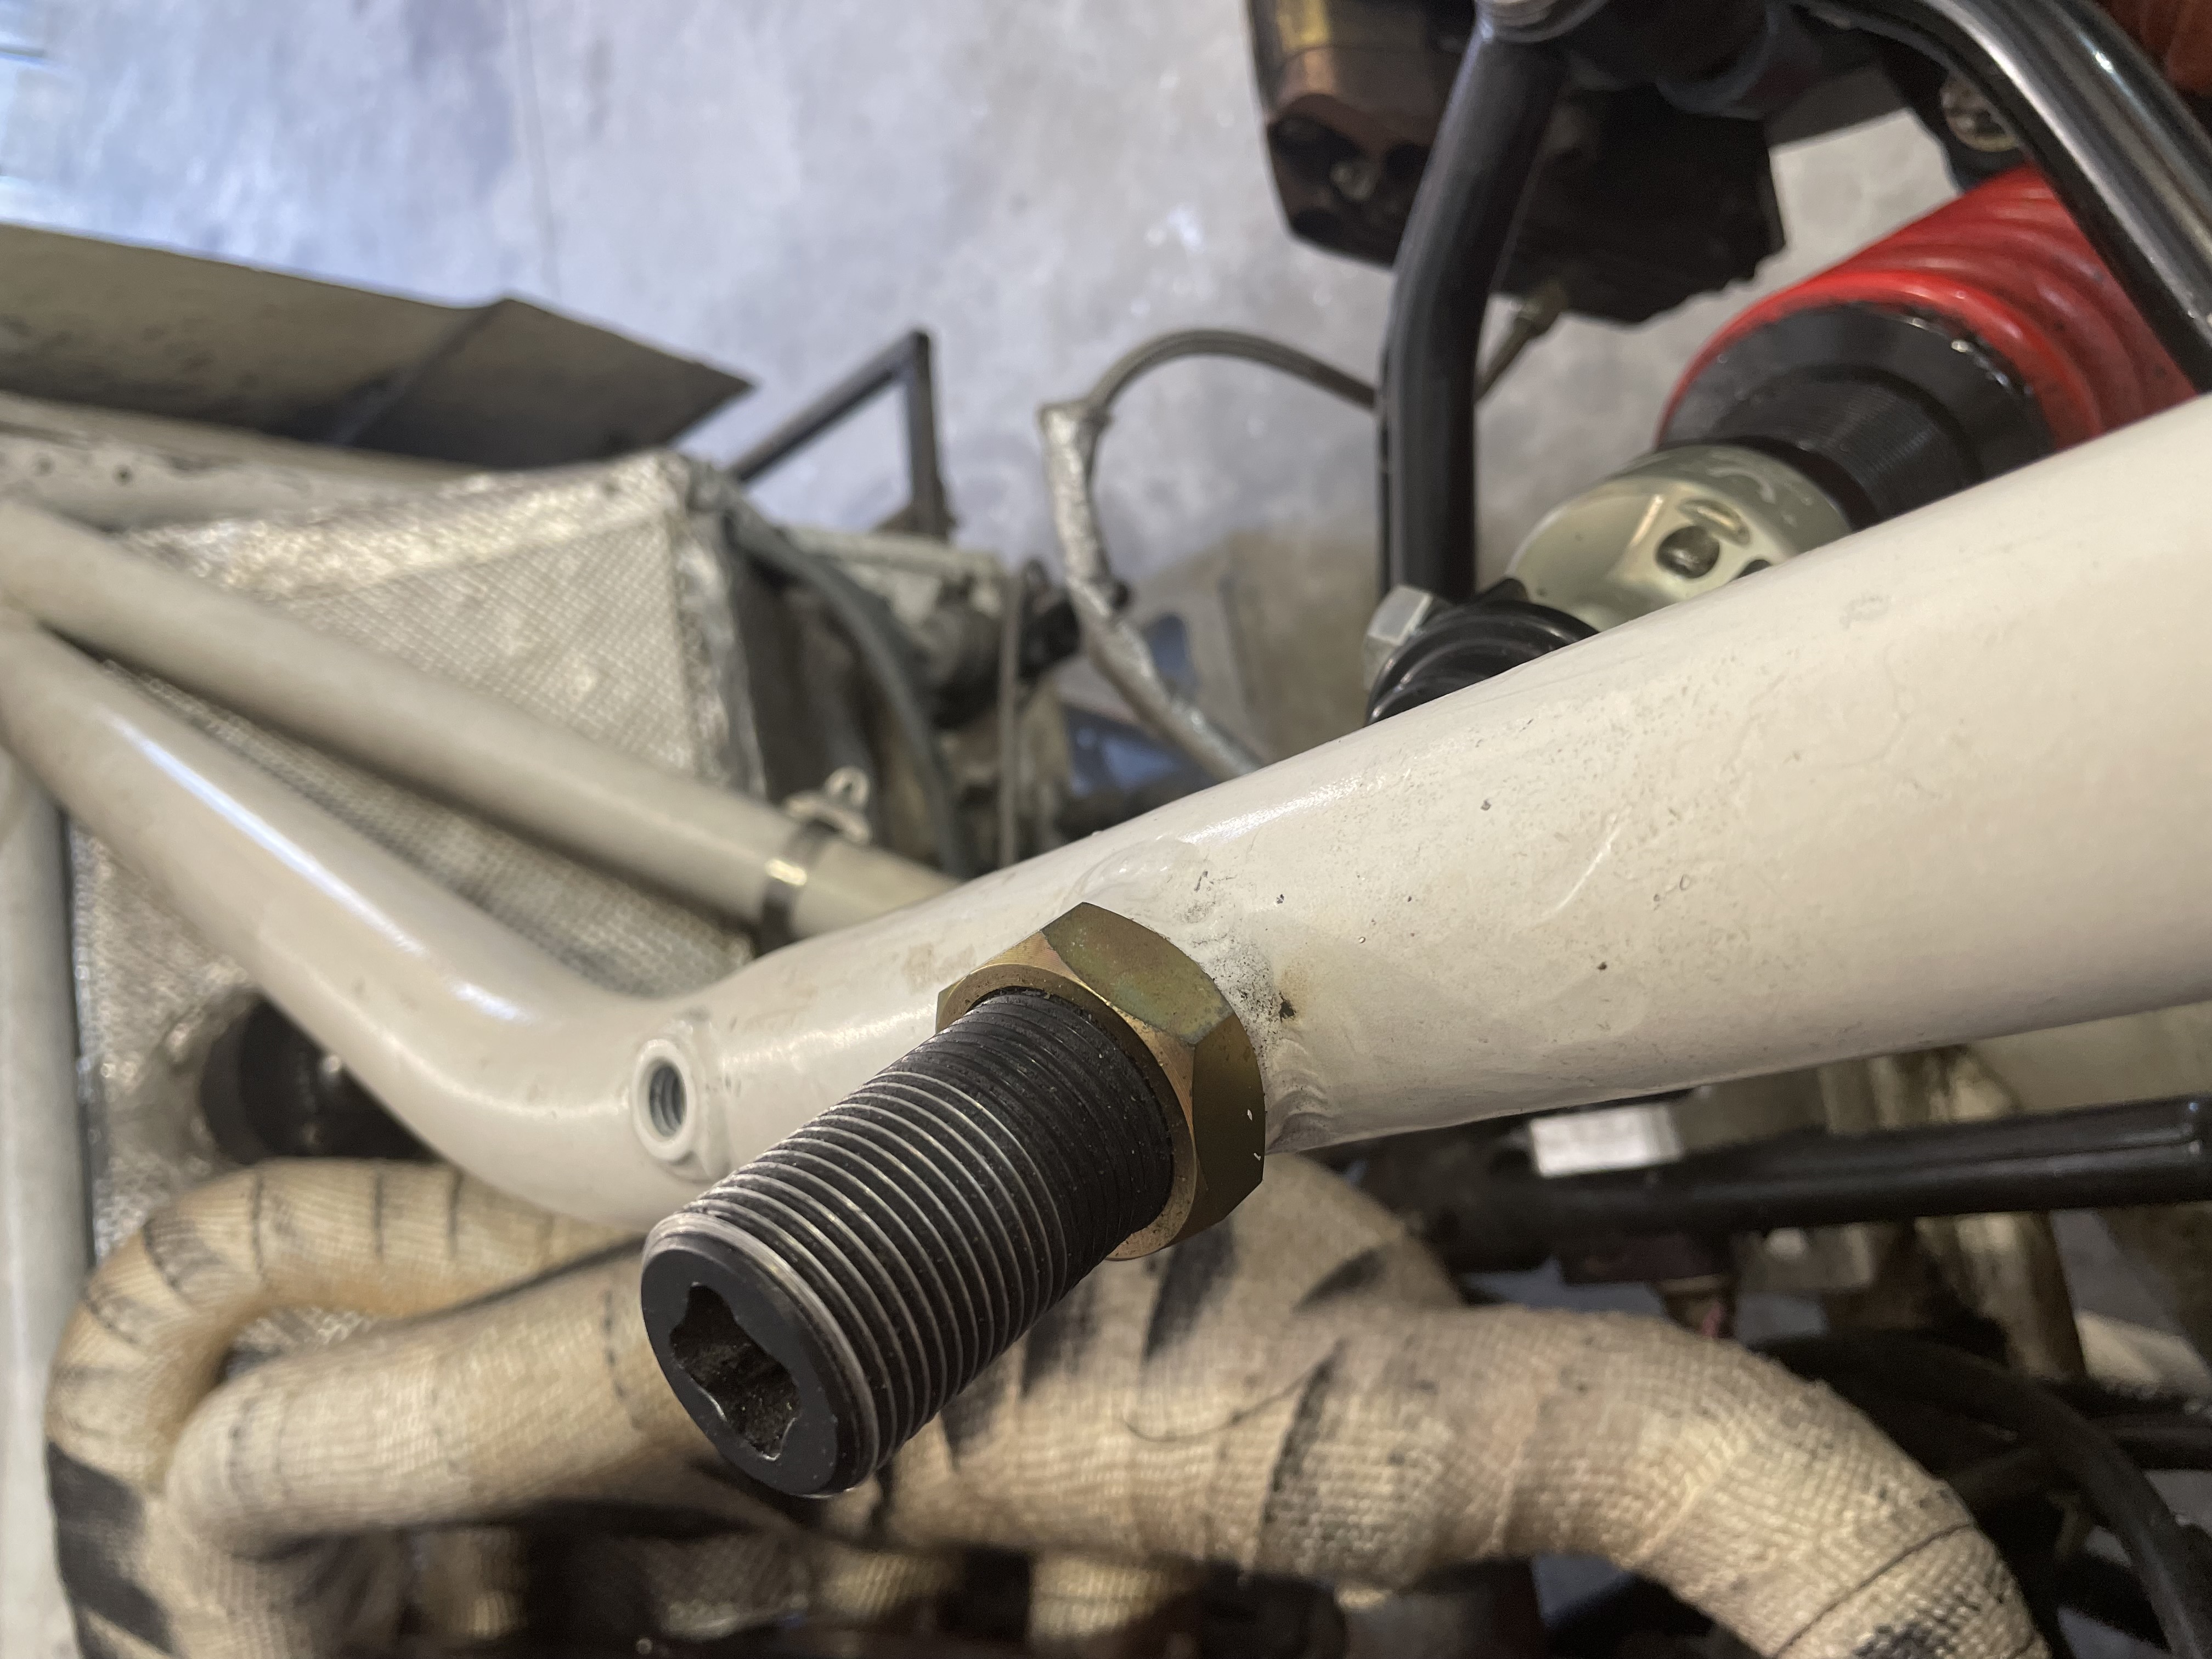
What exactly are ride height adjusters? Ride height adjusters are basically an adustable upper mounting point for your front shocks. They consist of threaded boss welded into the chassis member, a threaded rod with integral shock mount and a pair of lock nuts to set the assembly at a fixed height.
Carefully mark the top and bottom of the chassis member to locate the centers of the hole to be drilled to accept the boss. Blue painter’s tape and a sharpie help here. Drill a small pilot hole, say 1/8”, first then use a hole saw and drill on slow speed to drill out the chassis to accept the boss.
Next tack the boss in place with your MIG or TIG then finish out the weld top and bottom. Clean up the area and repaint to match the chassis.
Now you are ready to reinstall the shocks. The threaded rod contains a ½” square drive at the top and chassis ride height can now easily be adjusted from above with a ½" drive ratchet or breaker bar. I’ve found this can be done while the car is on its wheels making ride height quick and simple to adjust. This also allows the springs to be preloaded as needed independent from ride height settings.
This project is well worth the effort for your race car and will improve the adjustability and simplicity of setting up the car for race weekends. Figure a day of your time and a couple hundred of your hard earned bucks.